


We highly recommend that you get professional assistance or replace the coaxial cable for your dash camera. However, with some knowledge, you can get your hands into it and repair minor connection complications.
Note that contacting professionals to repair your coaxial cable ensures that you avoid any hazards. Sometimes, your coaxial cable may break, and just a handyman repair is enough to repair the mess.
You may think of shelling out money to buy a new coaxial cable for your dash camera if you recently noticed a broken cable. Purchasing a new one can be a good idea and an assurance that your problem will be solved. However, with our instructional guide and the right tools, you can save money by repairing it yourself.
Repairing a broken, damaged, or cut-off coaxial cable may not be as complicated as some people perceive. It is within the capabilities of any handyman.
Therefore, before you dish out that amount of money, read on and offer to repair your broken coaxial cable for dash cam a try.
How to identify if your Coaxial Cable for the dash camera is Broken
If the light on your dash camera fails to turn on, that is an indication of having issues with the system; broken or damaged coaxial cable could be in the play.
You may choose to try troubleshooting your dash cam before taking the idea of fixing the coaxial cable.

The first troubleshooting step involves doing a power cycle on the dash camera. Simply and carefully unplug the camera's power cable, then wait for the lights to switch off. Give it about 15 to 20 seconds, then put the power back on and check if your dash camera lights work.
The second troubleshooting step involves formatting the card using a computer.
Already formatted cards will initiate a re-initialization if you plug it into your dash camera then put the power on. This exercise can also help to correct the issues in the system.
The last step involves looking into a firmware upgrade using a browser or computer instead of a smartphone.
Professionals have found that smartphone firmware updates are highly vulnerable and can cause problems on your dash camera. Therefore, you may not wish to risk your dash camera at this time.
If you try the power cycle, format, and firmware update troubleshooting steps in vain, then you may need to look at the connections of your camera's coaxial cable.
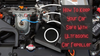
Commonly, a bent, damaged, or broken coaxial cable can cause a malfunctioning dash camera.
In most cases, a bent coaxial cable comes into play during installation. Some people may accidentally plug the cable into the dash camera port at an angle that forces it to bend. Professional installation personnel rarely make such mistakes.
It is best to be cautious at this troubleshooting stage because the risk of causing physical damage to your dashcam components is relatively high. Plugging and unplugging your coaxial cable increases the risks of causing damages.
Note that most warranty guarantees do not cover physical damages. Therefore, risking physical damage amounts to the risk of losing your warranty.
You can use a bobby pin to pull back bent dash camera port pins. However, remain cautious since doing so may be a high-level risk.
If you notice a missing pin, you will need to replace the cable as soon as possible.
In instances that you find your cable has been plugged in in a way that causes the pin to bend or snap off, remember to check the female port of your dash camera to ensure it is not mangled or bent too.
Plugging in a new cable into a mangled or bent female port will be risky. Remain cautious not to cause more issues while trying to address the one at hand.
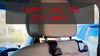
How to Repair a Coaxial Cable
There are about five simple steps to follow to repair your damaged coaxial cable instead of stressing your wallet to purchase and change the whole system.
Repairing is less expensive than purchasing a new system; hence it will save your time and cash.
If you follow our steps carefully, your dash camera will not likely lose any noticeable signal strength.
However, you may need to contact a professional if you follow our steps and notice some differences in the functional strength of your dash camera.
Else, you may choose to change the entire line because the system can get damaged beyond repair.
Step #1
Use liquid electrical tape if you notice any damage to the insulation covering. Note that the other parts of the system should be intact.
The liquid electrical tape will create another new insulation barrier when it dries.
Step #2
Chop the damaged region of the cable if your coaxial cable shows signs of having been cut into. Ensure you have some slack wire that you will need to pull.
Step #3
Hold the newly made wire ends, then twist the cable ends into them.
Pull back about half of the exterior insulation, leaving the silvery wire folding over while twisting on end.

Strip half of the internal insulation and expose the copper wire in the middle.
Finish this step by turning the cable ends clockwise to help them screw on.
Step #4
Use the coaxial joiner to join the two newly made ends together.
Step #5
If you find the coaxial cable end screwing into the dashcam is damaged, you may need to change it with a new end.
Simply chop off the damaged end and twist the cable on the new end by turning it clockwise.
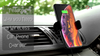
How do You Fix a Coaxial Cable That is Cut in Half?
Coaxial cables for dash cameras comprise a metal filament (made of copper and insulated using a layer of PVC). The cable is, in most cases, wrapped in braided foil or aluminum.
If your coaxial cable is cut into two, intertwining the two ends of the spliced cable can have profound impacts. However, you can fit the detached ends of your coaxial cable using new cable connectors and join them with a coaxial coupler.
Use the following seven simple steps to fix your coaxial cable that has been cut into two:
Step #1
Carefully and cautiously, trim the two disconnected ends of the coaxial cable.
You will have two clean cable ends cut horizontally.
Step #2
To set the tool to the stripping angle that matches the type of cable you intend to work with, slide the button at the top of the flexible coaxial cable stripping tool forward.
Step #3
Open the coaxial stripping tool's jaws and position the tool slightly over an inch down the chopped cable's initial end.
To create a full cut, close the jaws of the stripping tool around the coaxial end and revolve the tool clockwise around the cable multiple times.
Step #4
To remove the cutting, slide the stripping tool off the coaxial cable. The stripping tool's shafts have made two cuts in the cable: one approximately half an inch down to uncover the copper filament.
A second, shallower cut about an inch down to uncover the aluminum plaiting and white PVC covering.
Step #5
Slide the copper strand of the cable through the coaxial connector's bottom.
Spin the connection over the cable's PVC layer, ensuring that the PVC fills the inside of the coaxial connector and that the connector is securely placed on the cable.
Step #6
Tighten the jaws of the crimping tool around the bottom of the coaxial connector after opening them.
Apply pressure to the coaxial connector so that it pinches the cable properly.
Step #7
Perform the stripping and clipping operation for the second split end of the coaxial cable, and then use a coaxial coupler to connect the two mended ends of the coaxial wire.
Coaxial cables' ends should be screwed into each side of the coaxial coupler.